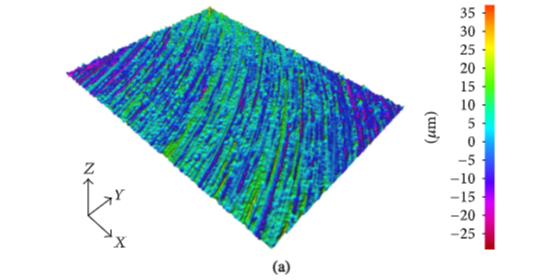
Surface Roughness is a hugely complicated subject, with entire PhDs devoted to it. Not surprisingly it’s an area which most engineers know little about. If this applies to you, don’t worry. We’re here to help expand your knowledge.
When you are buying CNC machined parts, it is useful to have some understanding of how surface roughness can impact cost.
Here are a few things you might not have known about Surface Roughness.
-
What is the unit of measure of Surface Roughness?
This isn’t an easy question, and there are more units of measure than you think. The most common is probably Ra or Rz, but there is also Rq, Rt, Rv, Rpm, Rmax, Rc, Ry, Wt and more. Ra also used to be known as CLA (Centre Line Average) or AA (Area Average).
The second letter is a subscript. There’s a ‘joke’ in Surface Roughness circles (hold on to your sides here): RA = Regular Army, Ra = Radium but only Ra is Surface Finish.
The unit of measure is linear – so micron or micro inches.
Read our blog on 'What is a Micron?'
-
How is Surface Roughness measured?
A Surface Roughness measure is a single number representing the roughness of a surface. To start with you need a trace of the surface profile, then you need to do some maths to get a squiggly line reduced to a number.
The machine to get the trace is like a record player stylus which is dragged across the surface and the vertical movements are recorded. Then there is some computing done, and this is dependent on which unit you are using.
The conversion of a trace to a number is a one-way door, so when you have converted to a unit you can’t convert back. This also means there is no easy conversion between units which is one of the reasons why it is so important to know exactly a) which unit you need and b) what you are asking for. There really is no going back without having the original trace. Note there are rough conversion factors, but these only hold true for regular sine waves so don’t treat them like other unit conversions.
-
What do the various units of Surface Roughness measure?
- Ra is the average of the surface trace
- Rq (root mean square) is more often used in optics than metal machining
- Rp is the highest peak. Rv is the lowest valley. Rt is the total of Rp & Rv
- Rmax is the maximum height within a specified length
- Rz is the sum of highest peak and lowest value in a sample length
And that’s just a few of them. There are also parameters for spacing, hybrid parameters, waviness, and statistical properties.
-
Why is Ra the most common measure?
Ra is the average of the surface trace. It is not always the best, yet it is the most commonly used. This is because it’s the easiest to convert using analogue electronics – which in the early days were much more available (or the only ones available). It is a simple case of integrating the data (equivalent to averaging it).
-
What’s wrong with Ra?
That’s like asking what’s wrong with averages. The two sets of numbers 1,50,99 and 49,50,51 both have the same average, but that doesn’t tell the whole story.
Look at these three surface traces – they would all have the same Ra measurement. So would other traces with less regular profiles, having bigger and smaller peaks that balance out in the average.

Read our blog on 'Tolerance'
-
What affects surface finish?
There are many factors affecting surface finish, including:
- The speed, feed and depth of cut
- Specific tool geometry
- The cutter path
- Wear on the cutting tools
- The tool material and the part material
Remember also that as a part is used it may wear. This may affect the peaks more than the valleys, so the Surface Roughness can change after it has been measured.
-
Is Surface Roughness always specified as a maximum?
No, despite what you might think. Some applications require a certain degree of roughness (for example to create a good seal with a gasket). In these cases, there may be a maximum and a minimum (a range) – and this can really present a challenge to the machinist.
Don’t worry if you now realise there was more to Surface Roughness than you realised, you’re probably in good company. Hopefully, you now realise that it is an important dimension to consider when specifying parts, and it can have a considerable impact on the cost of machining.
Have you got a project you would like to talk through with us?


 Get in touch

